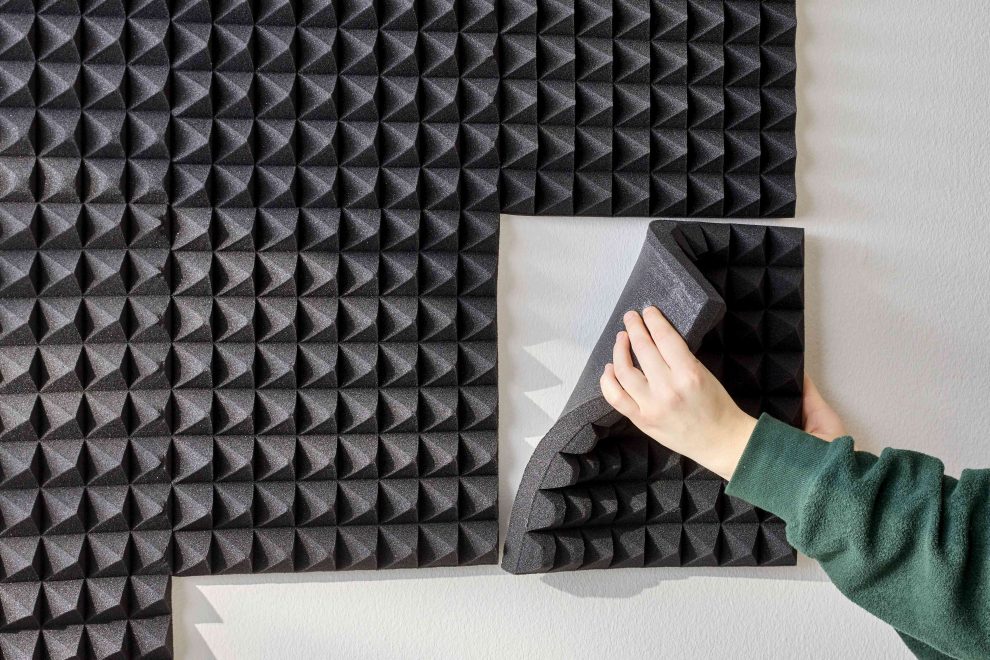
A feature wall that looks great and improves the acoustics of your living space? Now that’s what we call a smart upgrade.
If you’ve ever noticed how sound tends to bounce off every surface in your lounge, especially if you have tiled floors, high ceilings, or an open-plan layout, you’re not imagining things. Echoes and poor sound quality are incredibly common in modern homes. But the good news? You can sort it out and add visual flair with one simple project: a sound-absorbing feature wall using sound panels.
Here’s how to plan, design, and build one that actually works—and looks the part too.
Why Build a Sound-Absorbing Feature Wall?
Sound-absorbing walls aren’t just for music studios anymore. When done right, they:
- Reduce echo and reverb
- Improve the quality of sound from conversations, TVs, and speakers
- Make rooms feel warmer, quieter, and more “finished”
- Add serious style points to your space
It’s a win-win, you get better acoustics and a design centrepiece that doesn’t just sit there looking pretty (although it definitely will).
Step 1: Choose the Right Wall
Start by picking your wall. Ideally, this should be:
- A large, flat surface without too many obstructions
- Facing or adjacent to where sound bounces most, like across from your telly, sofa, or dining table
- Visually prominent, since this will be your statement wall
Popular choices include the wall behind your TV, the one behind your sofa, or even the wall that faces your main seating area.
Step 2: Decide on the Look
Gone are the days of dull foam tiles. Now, sound-absorbing panels in Singapore, for example, come in a variety of stylish options, like:
- Fabric-wrapped panels in neutral or bold tones
- Wood slat panels that feel sleek and architectural
- Pantone-coloured felt tiles for a pop of fun
- Geometric shapes that double as wall art
Pick a style that suits your space—Scandi, industrial, Japandi, contemporary, even vintage, can all work with the right finish and layout.
Tip: Sketch your layout on paper or lay the panels out on the floor before committing to placement.
Step 3: Measure the Space
Get your tape measure out and mark the wall area you plan to cover. Remember, you don’t need to go floor-to-ceiling or edge-to-edge. Even partial coverage can make a big difference acoustically, especially if placed thoughtfully.
Aim for roughly 20–30% coverage of the room’s hard surfaces to start. You can always add more later.
Step 4: Pick Your Materials
Different materials absorb different types of sound. Here are a few to consider:
- Fabric-wrapped foam – Great for mid to high frequencies; soft and elegant
- PET felt – Eco-friendly and colourful, ideal for general sound absorption
- Wood slats with acoustic backing – Adds warmth and depth, excellent for modern interiors
- Mineral wool or fibreglass core panels – High-performance and ideal for larger spaces
Choose based on the balance between performance, appearance, and budget.
Step 5: Choose a Mounting Method
Depending on your material and wall type, you can install panels using:
- Peel-and-stick adhesive strips (best for lighter panels)
- Velcro backing (great for renters or temporary installs)
- Mounting clips or Z-clips (for heavier materials or permanent fixtures)
- Wood batten frame systems (if you’re building a slatted wood wall)
Just make sure you check your wall condition and weight limits before choosing a method.
Step 6: Prep the Wall
Before installing anything, give your wall a quick once-over:
- Clean the surface (dust and adhesive don’t mix well)
- Fill any holes or cracks
- Mark your grid lines or centre point using painter’s tape or a pencil
- Lay out the panel pattern on the floor first to visualise the end result
You want everything neat, straight, and measured out—especially if you’re using shapes or colours to create a specific design.
Step 7: Install the Panels
Now for the fun part. Start from the centre or a straight edge (like the top or baseboard) and work your way out. This helps you keep things symmetrical and level.
Take your time—small adjustments can make a big difference visually. Use a level if needed, especially for geometric patterns or slat walls.
Tip: If using adhesive strips, press firmly and hold each panel for 30 seconds to ensure good contact.
Step 8: Style Around It
Once your feature wall is up, style the room to match:
- Add throws, cushions, and rugs in coordinating colours
- Choose soft lighting or wall sconces to highlight the texture
- Keep other décor minimal—let your new wall be the star
You’ve created a sound solution and a design moment, so give it the space it deserves.
Step 9: Test the Acoustics
Now that everything’s in place, take it for a spin. Watch a film, play some music, or just sit and have a chat. Notice how the space feels quieter, more balanced, and less harsh?
Even if it’s not perfect yet, it’s a massive step forward—and you can always add more panels or soft furnishings as needed.
Final Thoughts: Big Impact, Low Effort
A sound-absorbing feature wall is one of those upgrades that feels fancy, but doesn’t require a full renovation. With a bit of planning and the right materials, you can completely transform how your living space looks and sounds in a weekend.
And once you experience the difference in comfort, you’ll probably start wondering why you didn’t do it sooner.


